EtherChannel Configuration
30 Apr 2022
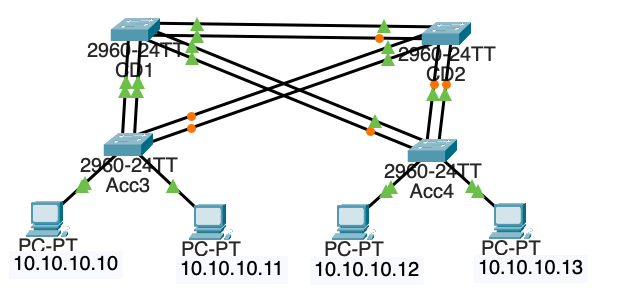
The Spanning Tree Protocol is a necessary protocol to prevent layer 2 loops and broadcast storms. However STP does not support load balancing, leaving much of the bandwidth unused in networks like the above where redundant links are configured. To fix this we can use EtherChannel, which bundles the physical links into a single logical interface allowing STP to not block the link. For this lab we will configure the EtherChannel using Link Aggregation Control Protocol (LACP) and a Layer 3 EtherChannel.
In this lab we will be;
- Configuring a Layer 2 LACP EtherChannel configuration
- Configuring a Layer 3 EtherChannel configuration
Configuring a Layer 2 LACP EtherChannel configuration:
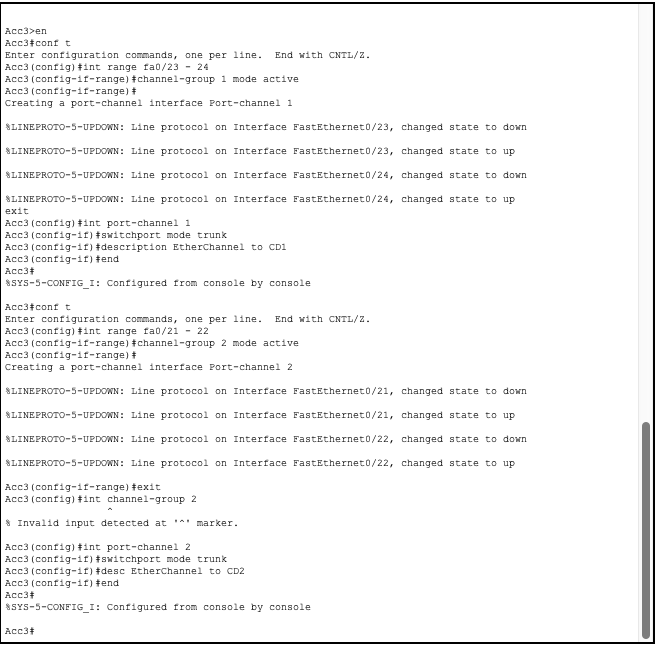
Acc3
Configure an etherchannel on links Fa0/23-24 and Fa0/21-22
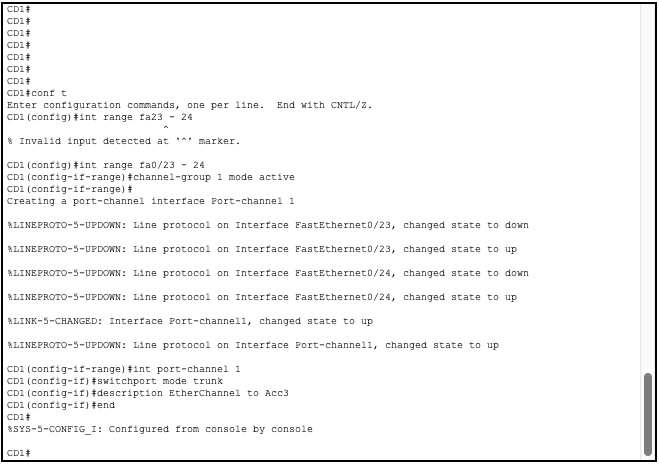
CD1
Configure an etherchannel on links Fa0/23-24
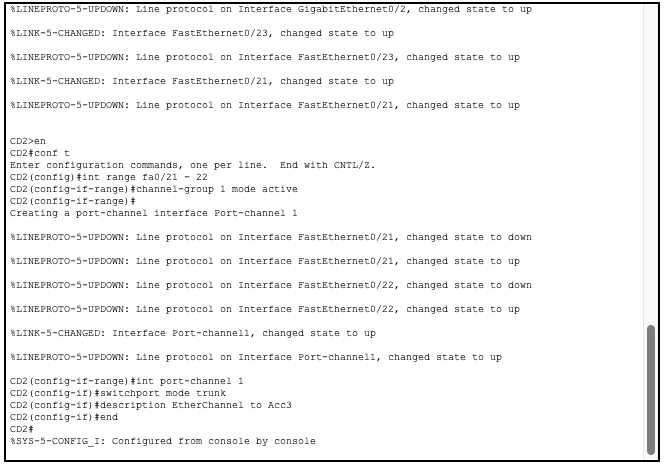
CD2
Configure an etherchannel on links Fa0/21-22
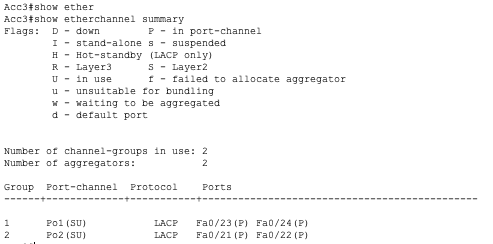
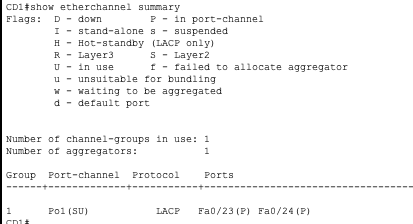
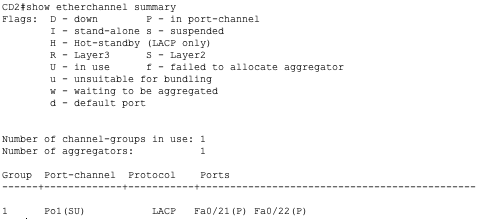
Using the command show etherchannel summary we can verify that these etherchannels have been correctly configured;
Acc3
Configure an etherchannel on links Fa0/23-24 and Fa0/21-22
CD1
Configure an etherchannel on links Fa0/23-24
CD2
Configure an etherchannel on links Fa0/21-22
We can also look at the packet tracer file and see how the links were we configured LACP are now load balancing, both being up or both being blocked, while the link from CD1 to Acc4 are not being load balanced, one link is up while the other is being blocked. Same issue on the link from CD1 to CD2.
Configuring a Layer 3 EtherChannel Configuration:
Layer3 etherchannels apply the same logic as layer2 etherchannels. These now bundle the logical layer3 links in order to load balance routing traffic.
This part of the lab uses 3 layer3 switches:
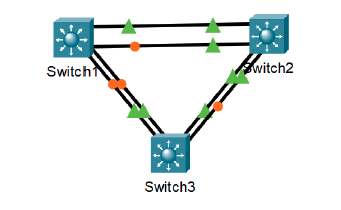
The commands to set up a layer3 etherchannel;
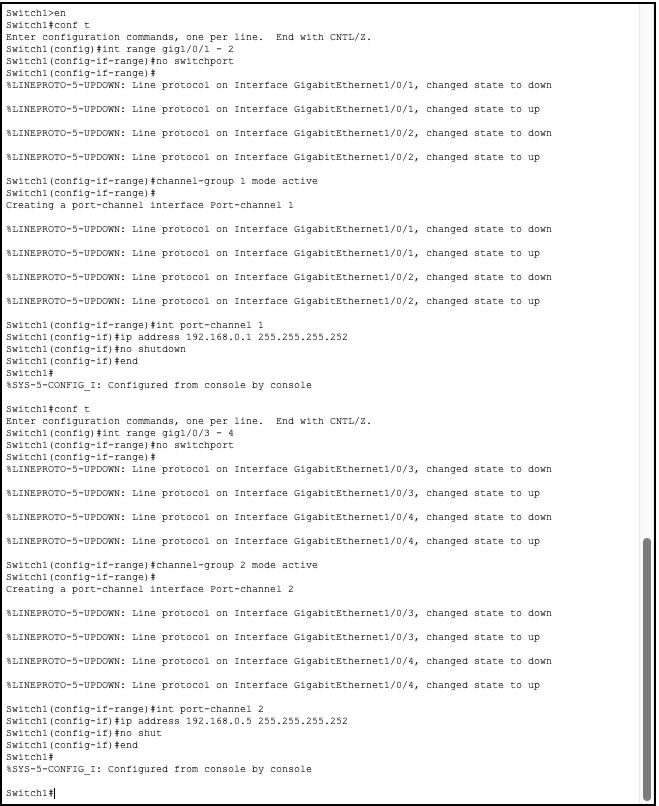
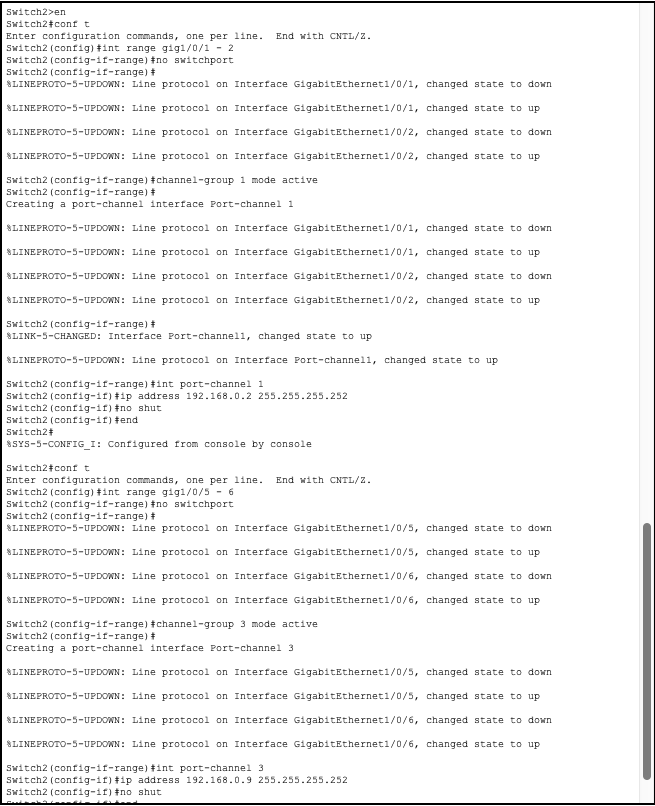
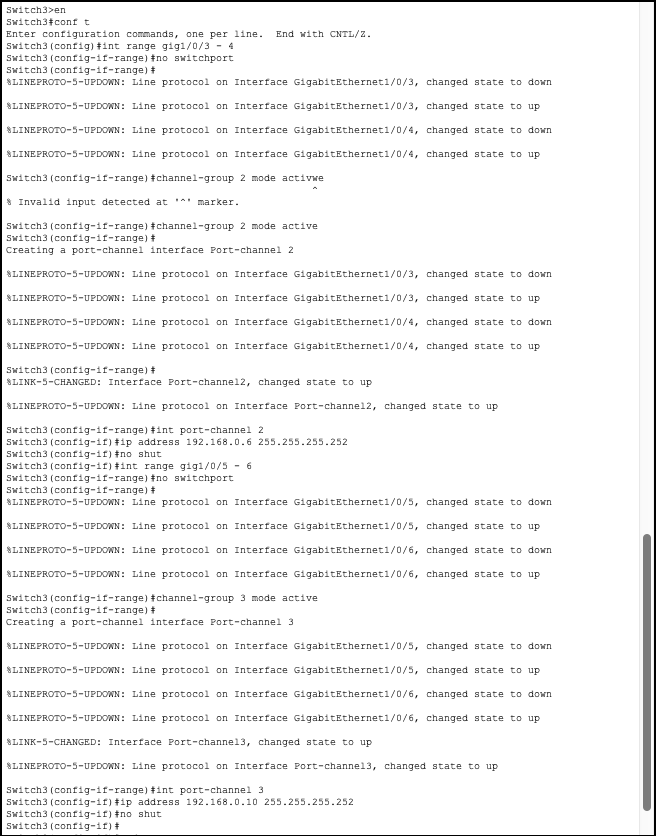
int range <interfaces>:no switchport: Necessary on a layer3 switch, converts the switchport into a ‘router interface’channel-group <#> mode active: Create the channel-group (referenced by #) and set mode to active (activates LACP)interface port-channel <#>: Enter config for your previously set port-channelip address <ip> <subnet>: Configure the port channel’s IP address and subnet maskno shut: Bring the link up
The other end of the link needs to match the LACP configuration in order to work correctly.
Switch 1
Switch 2
Switch 3
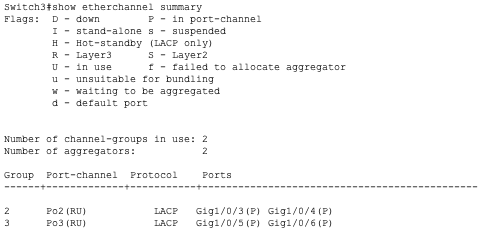
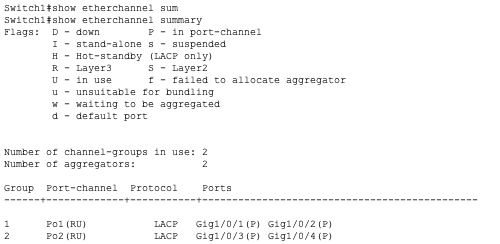
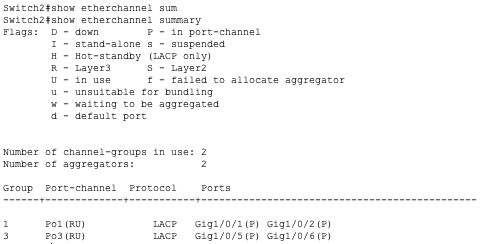
Once again we use show etherchannel summary in order to view our configured etherchannels.
This time you’ll notice the Port-channel has the (RU) characters appended instead of (SU). This verifies that we created layer3 etherchannels and not layer2.
Switch 1
Switch 2
Switch 3
